2021 Camellia Celebrations – Propagating Camellias at Chiswick House
The camellias in the Conservatory here at Chiswick House & Gardens are in full flower now, it’s time for us to start thinking about this year’s generation of cuttings. You’d maybe think it’s a bit early (we’ll take the cuttings themselves in summer) but camellia is a little more awkward than some other plants. This week, gardener Chris Greer has been telling us all about how the team propagate our heritage camellias:
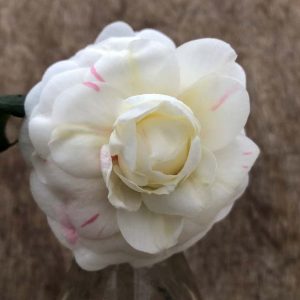
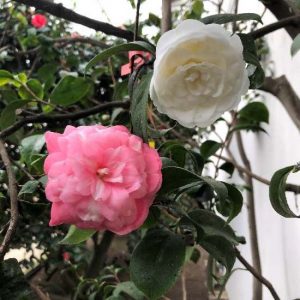
“Unlike the Tradescantia or Aloe you’ll see on my windowsill at home, camellia don’t behave. The best example of this is one of my favourites, Camellia japonica ‘Imbricata alba’ (figure 1). It produces ‘sports’ – a flower or even a whole branch with a completely different flower form, in this case almost pure pink instead of the perfect double white with delicate pink flecking that it’s supposed to have(figure 2). Just imagine taking a whole tray of hundreds of cuttings and 2 years later discovering half the plants turning out pink!

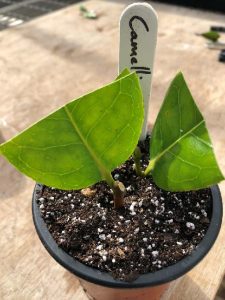
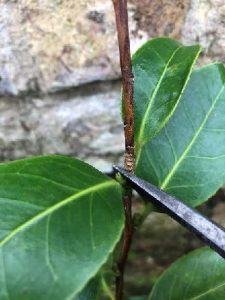
“So our first task is just to identify which branches we want to propagate from. It’s simple really, we just go have a look at the plant and attach a red label to the correct branch (figure 3) to stop someone coming along and pruning it. After that’s done we just have to stand back and wait patiently for a few months for the plants to finish flowering and start growing.
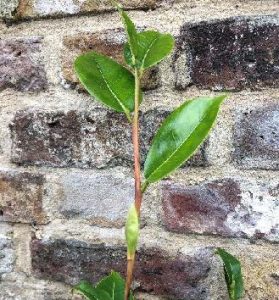
“Five of six months later, it’s time to take our cuttings. Here and in most commercial nurseries we use semi ripe cuttings, the same type of cutting can be used for most evergreen woody plants with a few exceptions. The month doesn’t actually matter; for us its July or August in the Conservatory, and September or October outside. What does matter is that the cuttings we take are still in their semi ripe stage. This is when the lush green shoot starts to go woody at the base, while still lush glossy and green at the top. With camellia japonica they start to go a similar shade to fresh root ginger peel as well (Figure 4).
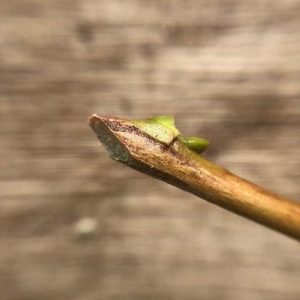
“We use sharp, sterile secateurs or snips to cut the material off the parent plant – above but as close to the bud as possible(figure 5). The bit between the buds just dies off, looks ugly and can be a pathway for disease to enter the plant. If we’re not going to prepare the cuttings immediately they get put into a sealable bag with a label; the ones you zip up and put in the freezer are perfect for this, or even a lunch box. Then they go into the fridge where they can keep fresh with for a few days – I try not to confuse them with my lunchtime salad, they probably don’t taste very good!
“At this point it’s worth taking a few minutes to sterilise our tools again. Wipe down with a bit of methylated spirit, plunge into boiling water or wave through a flame, the choice is yours. Our team prefer the boiling water method, as the extra can be used to make a mug of tea!
“The seed and cutting compost we use in the gardens is a commercial mix of grit, bark, sand and organic matter. But in some ways the specific recipe doesn’t matter as long as it doesn’t hold too much water, have too rich a mix of nutrients and doesn’t collapse into something that looks like chocolate brownies gone wrong. The nutrients aren’t needed: most of the time the cuttings are in it they have no roots after all. If the compost holds too much water or collapses the cuttings will rot before they root. We recommend a mix of half store-bought seed and cutting compost, and half small expanded clay granules. These are actually intended to absorb oil spills but are a perfect ingredient for soil mixes too.
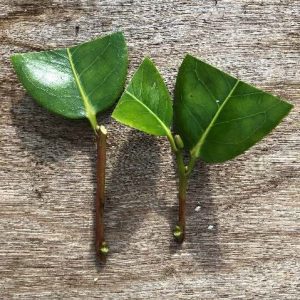
“The size of the final camellia depends on how many plants you want and how much material you have available. Stem tip cuttings are bigger, and so you would need more compost. Leaf buds are smaller, and so use less compost (figure 6).
“We cut the cuttings to length with the secateurs, just above a bud again, then use the knife to slice the leaves in half across their width. Large leaves loose water quickly so if they’re halved they should hopefully loose less. Then we cut diagonally as close below the bottom bud as possible (that bottom leaf needs to come off too) and take a very thin slither off the back exposing the cambium (figure 7).
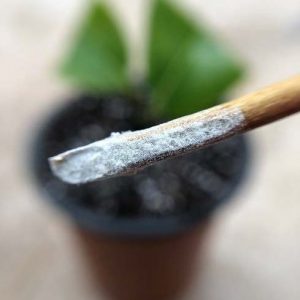
“The cut end is dipped in rooting powder and given a little tap to remove any excess (figure 8). Next we make a small hole in the compost (dibber, pencil, handle of a tea spoon all do the job perfectly) and put the cutting in up to just below the first leaf and firm the compost below it. It is important to water from below, so as not to disturb the leaf. We do this by sitting the pot in a tray of water until the surface soil is damp. A label is added with the camellia’s name and date and not it’s time for waiting patiently. Humidity is vital for propagating camellias. We seat ours on a heated mist bench, that automatically sprays a fine mist every few minutes to keep things nice and moist.
“If you’re doing this at home – a good trick is to pop the pot inside a zip up freezer bag, using a stick to make it tent, then seal it up nearly all the way and blow in the gap to inflate the bag like a balloon. The perfect low-tech propagator.
“It can take around 6 months for roots to form; you’ll know it’s worked when your cutting starts to grow a little. Propagating at home can be very rewarding, but it can take a lot of practice, patience and persistence. So just bear in mind that the plants we started in 2018 are starting to look really nice now, and the ones from earlier are even better – if your heart is set on a camellia, it might be easier to just get in contact with us!”